
Segmentation processes can take up a lot of time when you want to create a targeted campaign. In the previous articles, we outlined different options on how to segment in Salesforce Marketing Cloud SFMC) using data filters and SQL queries.
However, neither of these methods can be called the ultimate solution for segmentation in SFMC. Why? Because these methods either don’t provide advanced methods or require technical skills that you may lack. What would be the solution? For instance, DESelect – an addon that runs inside SFMC and intuitively combines data on the fly. There is no more need to learn SQL or ask your colleagues to create queries for you. DESelect is an exceptional solution for a top-notch segmentation.
A 3-step guide: How to filter on Data Extensions with DESelect
In order to create a targeted campaign with information from various data extensions in DESelect, you should start with creating a new selection (think of this as a “segment”).

Step 1. Selection Criteria
Firstly, you have to choose which DEs you want to filter. For instance, you want to create a new segment of prospect contacts linked to their companies. Normally, in order to do that, you would rely on SQL to do this type of segmentation but with the drag-and-drop interface of DESelect, there is no need to write a SQL query for that.
- Choose the DEs from the available ones from SFMC through drag-and-drop
- Repeat the same action with the next DE
- Choose the relationship between DEs: with/without matching, with matching, with all matching
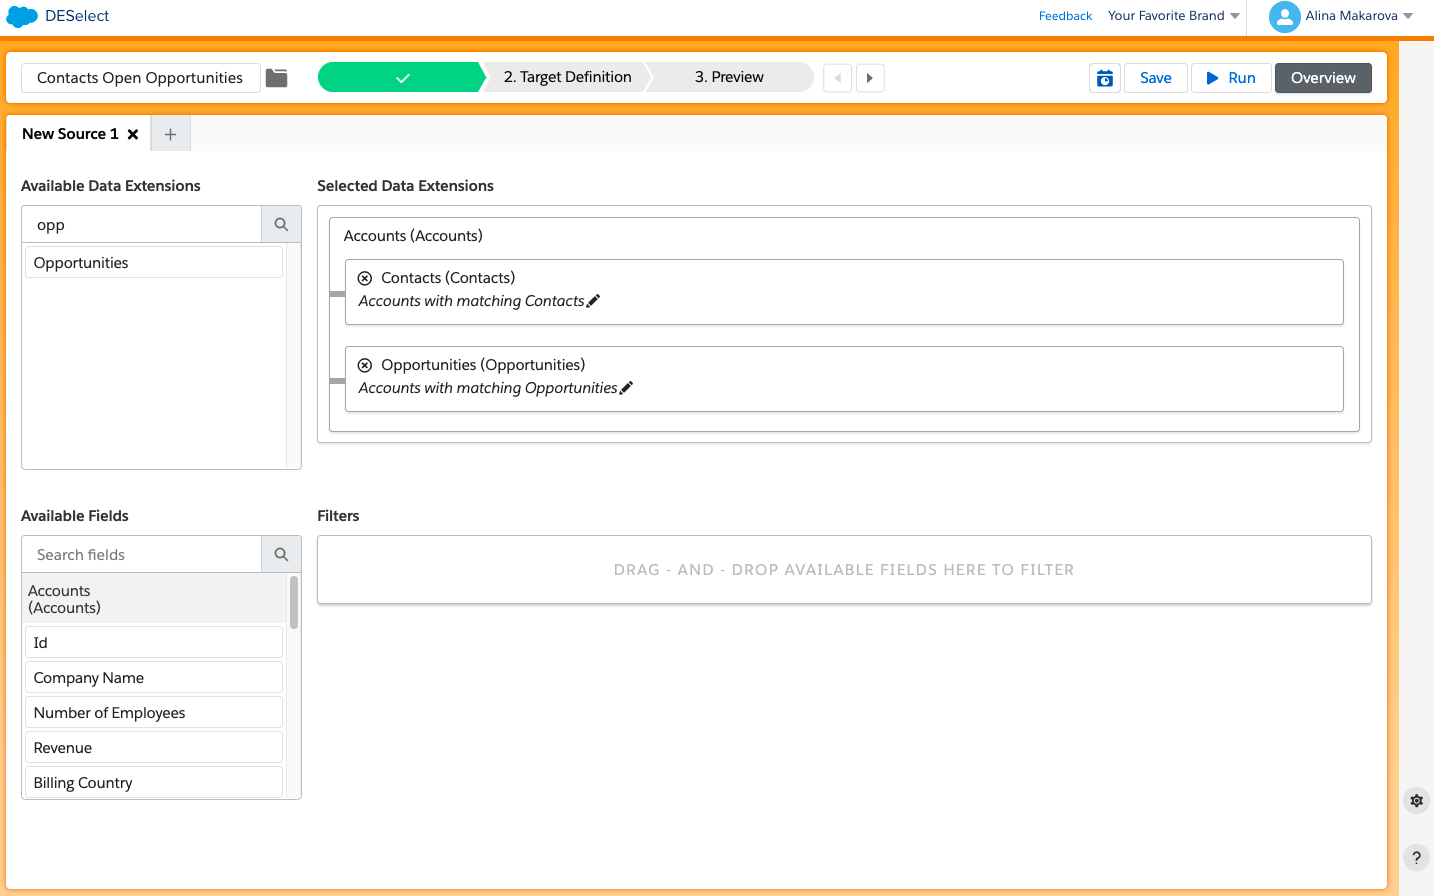
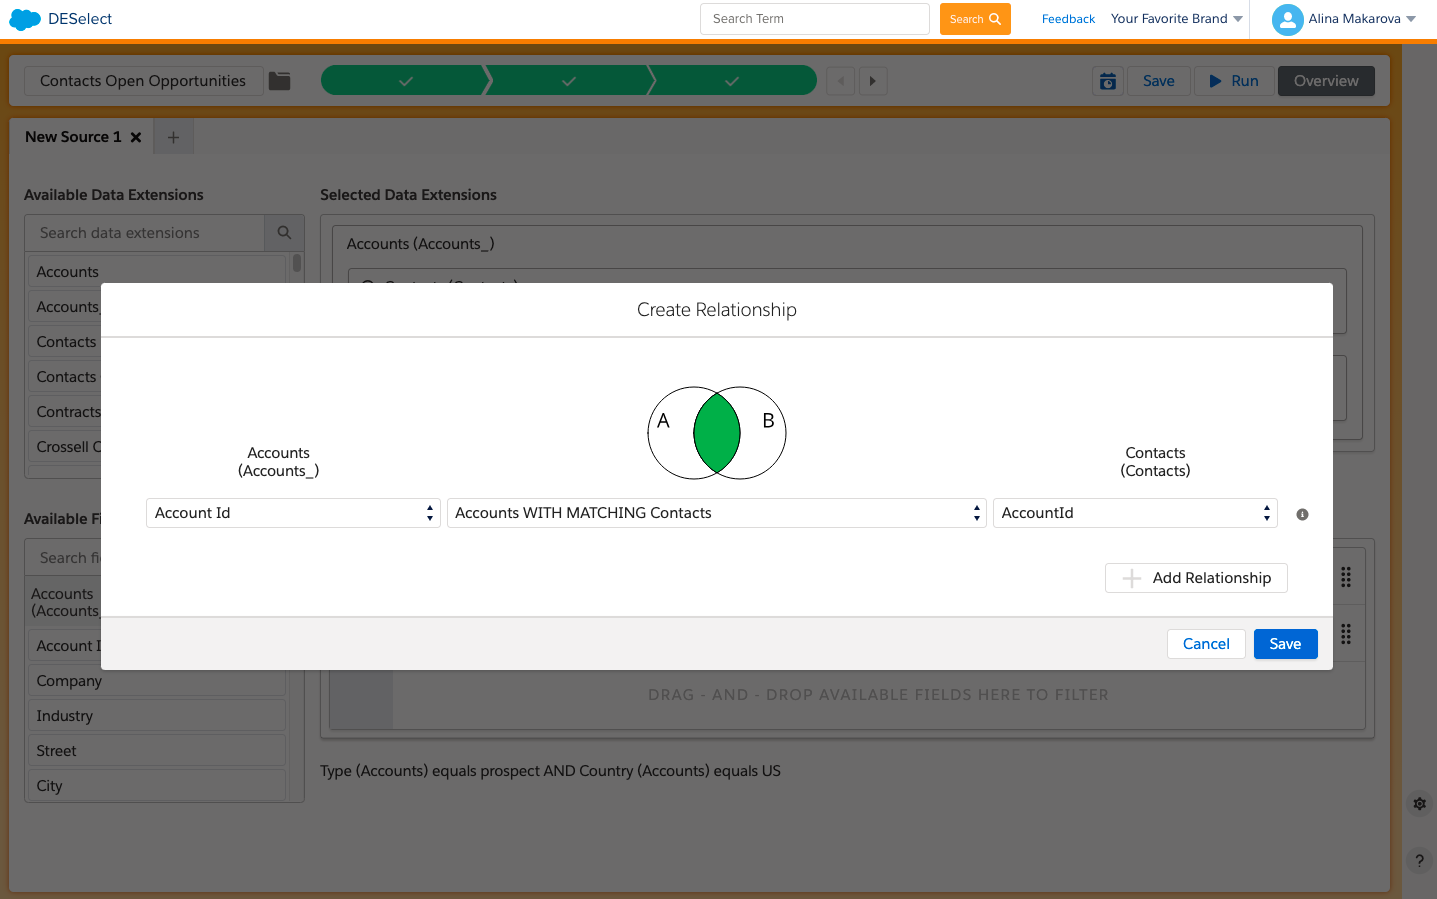
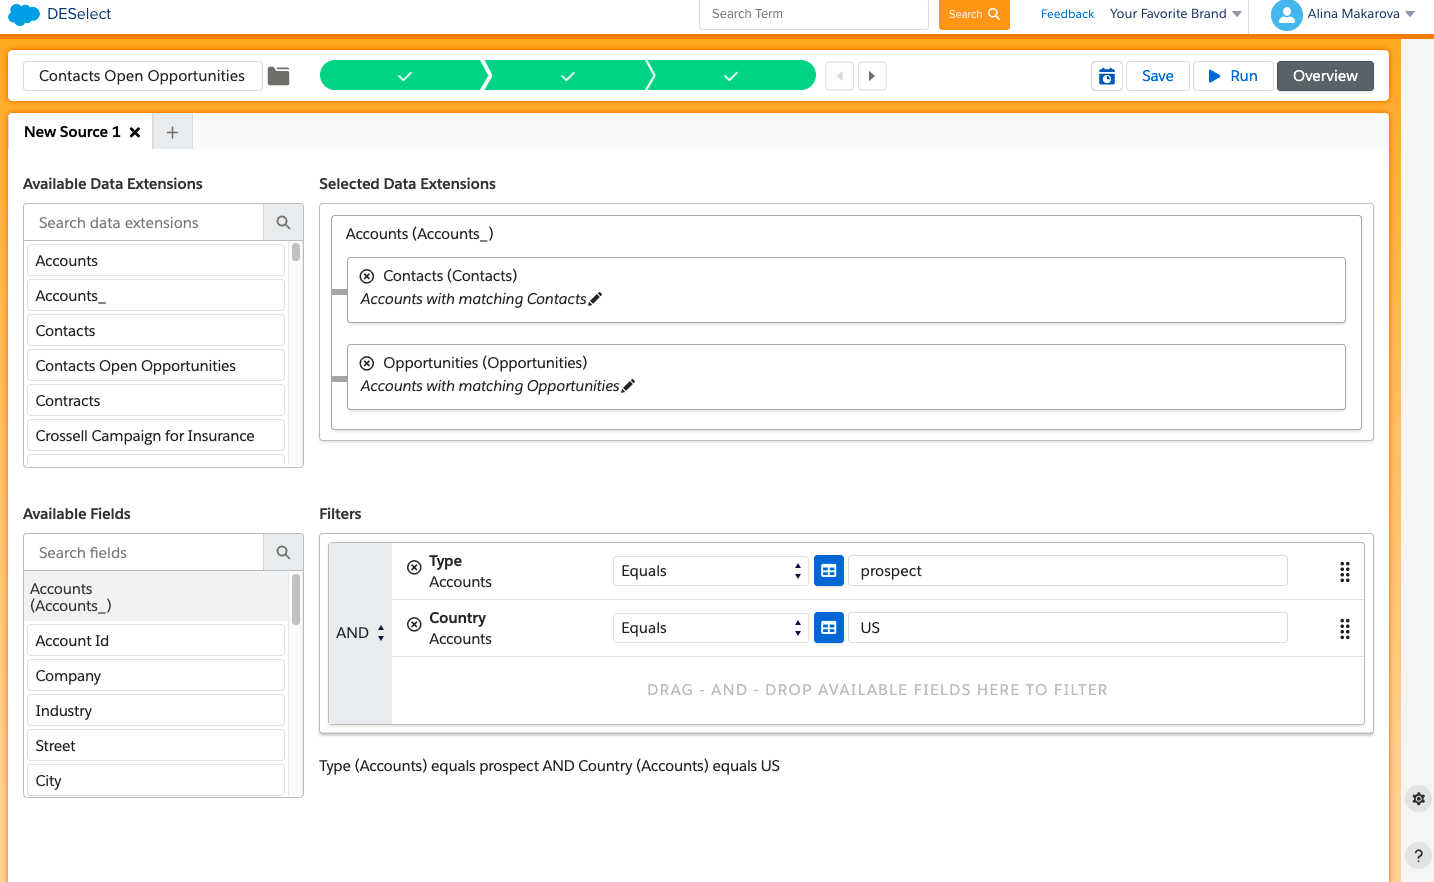
At the bottom, you can see that all the fields from both of your DEs are extracted and placed in the ‘available fields’ section. Now, you can choose to filter on as many fields as you want to.
- Drag-and-drop available fields to the right (e.g. for our campaign we need accounts which field ‘Type’ matches the ‘prospect’ criteria, and are coming from the US)
Step 2. Target Definition
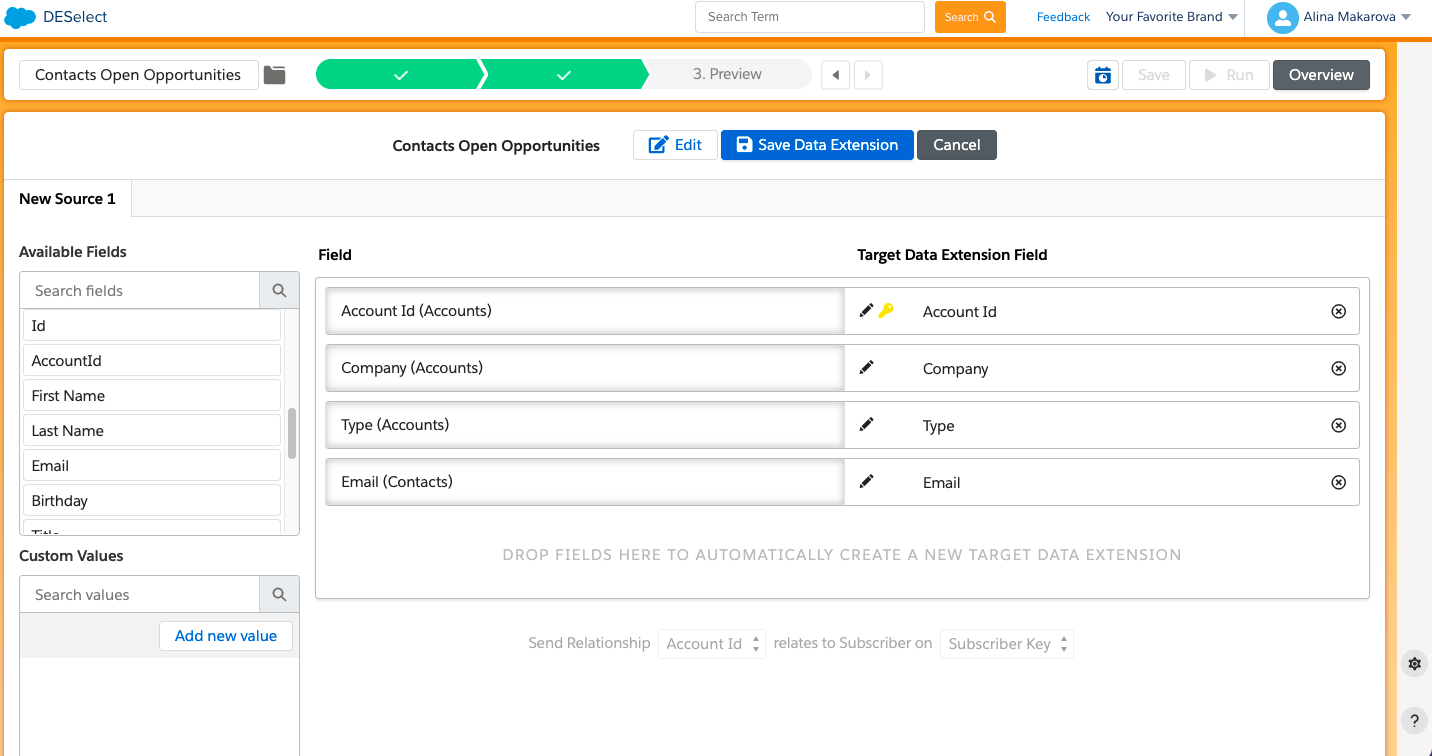
In this step, we need to choose our target DE. There are a few options at this point: we can create a DE on the fly or choose an existing DE to populate with data from our new selection.
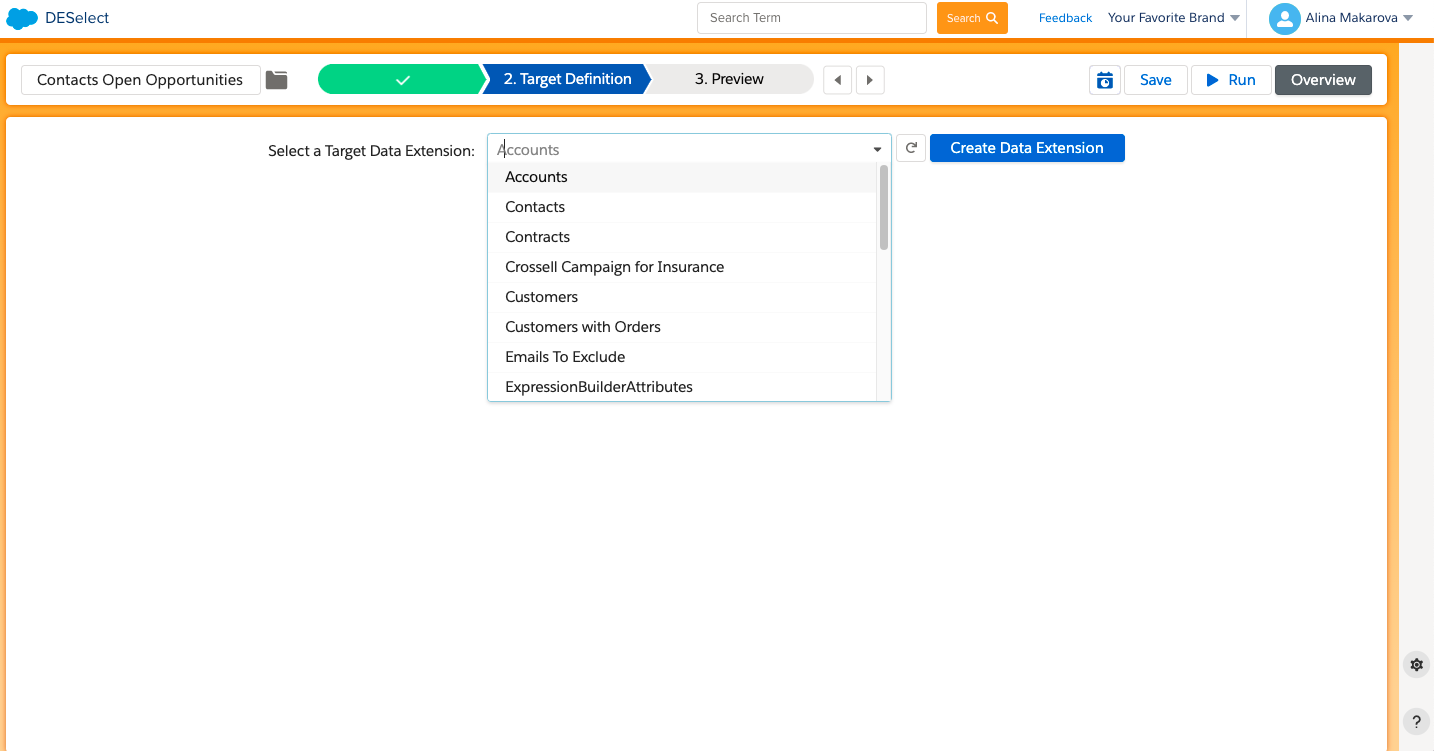
If you want to create a DE in the DESelect environment, you need to choose the fields that you want to have in your target segment.
- Drag-and-drop from the available fields on the left to your desired DE on the right (e.g. for this future campaign we need: Account Id, the Name of the Company, Type which equals Prospect, and Email Address)
- Hit Create a Target DE
Step 3. Preview
Before saving your new selection, you can preview the resulting data extension and how many records it would contain, to see if you want to add any changes.
- Hit Run Preview
- Check if the fields are populated correctly
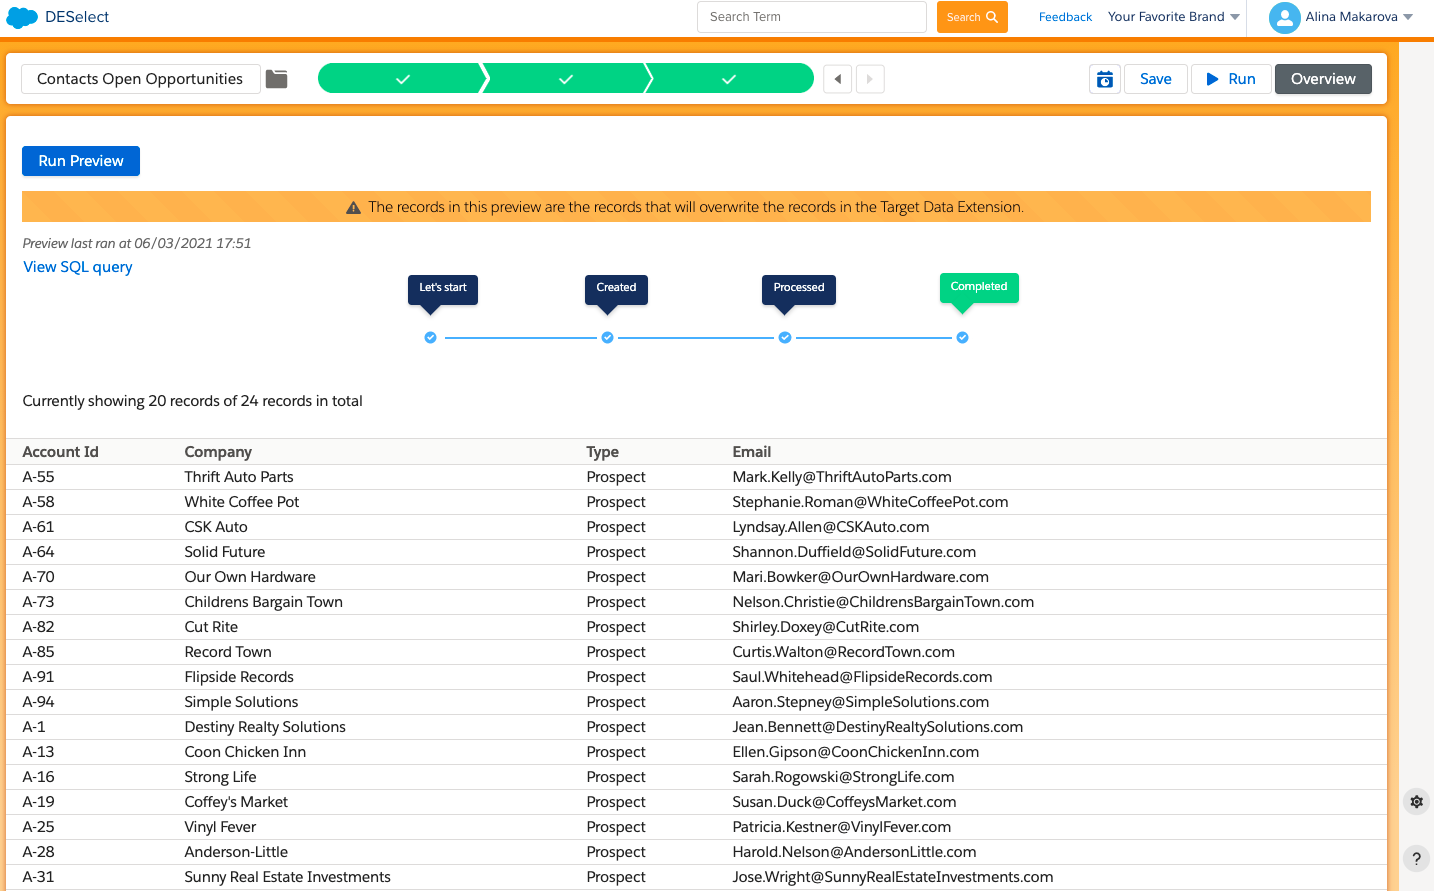
Once you are happy with the preview, you can run your selection and it will automatically populate the target DE in your SFMC.
No need to learn SQL anymore, enjoy a convenient drag-and-drop interface and save precious time on segmentation using DESelect, book a demo here.
- A 3-step guide: How to filter on Data Extensions with DESelect
- Step 1. Selection Criteria
- Step 2. Target Definition
- Step 3. Preview
Latest Articles
-
Kyra Constam, Creative & Web Manager
Company Culture Meet Our Team: Creative & Web Manager, Kyra Constam In the dynamic world of design, Kyra Constam stands as a definition of talent and innovation. Get her take on her DESelect journey → Her journey at DESelect began with the title of Senior Graphic Designer, where her talent and hard work shined […]March 27, 2024Salesforce Announce Marketing Cloud Growth Edition Built on Top of Data Cloud
While Salesforce’s Marketing Cloud has long been synonymous with cutting-edge marketing automation, the unveiling of Marketing Cloud Growth Edition (MCG) marks a pivotal moment in democratizing marketing prowess. It is the very first glance of a marketing app developed in-line with Salesforce’s core platform and what it embodies. It is a big announcement from Salesforce […]March 26, 2024What Are the Typical Stages of the B2C Customer Journey?
In the dynamic and competitive realm of B2C marketing, understanding the stages of the customer journey is essential for crafting compelling marketing strategies that resonate with consumers at every touchpoint. This journey, a detailed map of a consumer’s engagement with a brand, is pivotal in shaping customer experiences and driving conversions. Let’s embark on a […]March 21, 2024Segmentation in Salesforce Marketing Cloud (SFMC)
You’ve already mastered segmentation in your everyday life. Your relationship with your family, friends, and colleagues is the biggest proof of your mastery. Why? Because you know what everyone around you likes and dislikes. And you tailor to their segment their behaviors, needs, lifestyles, and hobbies to keep them happy. If your best friend is […]March 20, 2024Join our newsletter to receive updates and helpful SFMC guides.


